

A leaking gutter end cap almost always comes down to one of three things: the sealant has failed, the cap has come loose, or water is backing up and overloading a joint that was never built to hold it. The fix is usually simple: remove the old sealant, clean the metal, fit the correct cap, seal it, and fasten it. This guide walks through how to tell which problem you have, how to seal the end of a gutter so it stays sealed, and when a drip is a sign of something bigger.
TL;DR
- Most end cap leaks come from loose caps or caps installed without enough sealant, so the repair is a clean reseal plus mechanical fastening.
- Old sealant must be scraped off and the metal cleaned and dried before new sealant goes on. Caulk smeared over a dirty leak fails again.
- Use a sealant made for gutter seams, and give it the full cure time the manufacturer lists before the next rain test.
- If the gutter is sagging, pulling away, or leaking at several points, the cap is a symptom and repair or replacement of the run is the better answer.
- Set your ladder on stable ground with a helper, and stay away from power lines.
Table of Contents
- Why gutter end caps leak
- Is it the cap, the seal, or something else?
- How to seal a leaking gutter end cap, step by step
- Choosing sealant and giving it time to cure
- Ladder, power tool, and wet-weather safety
- When resealing is not enough
- Our perspective: why end caps fail on Florida homes
- Let us handle the leak
- FAQ
- Sources
Why gutter end caps leak
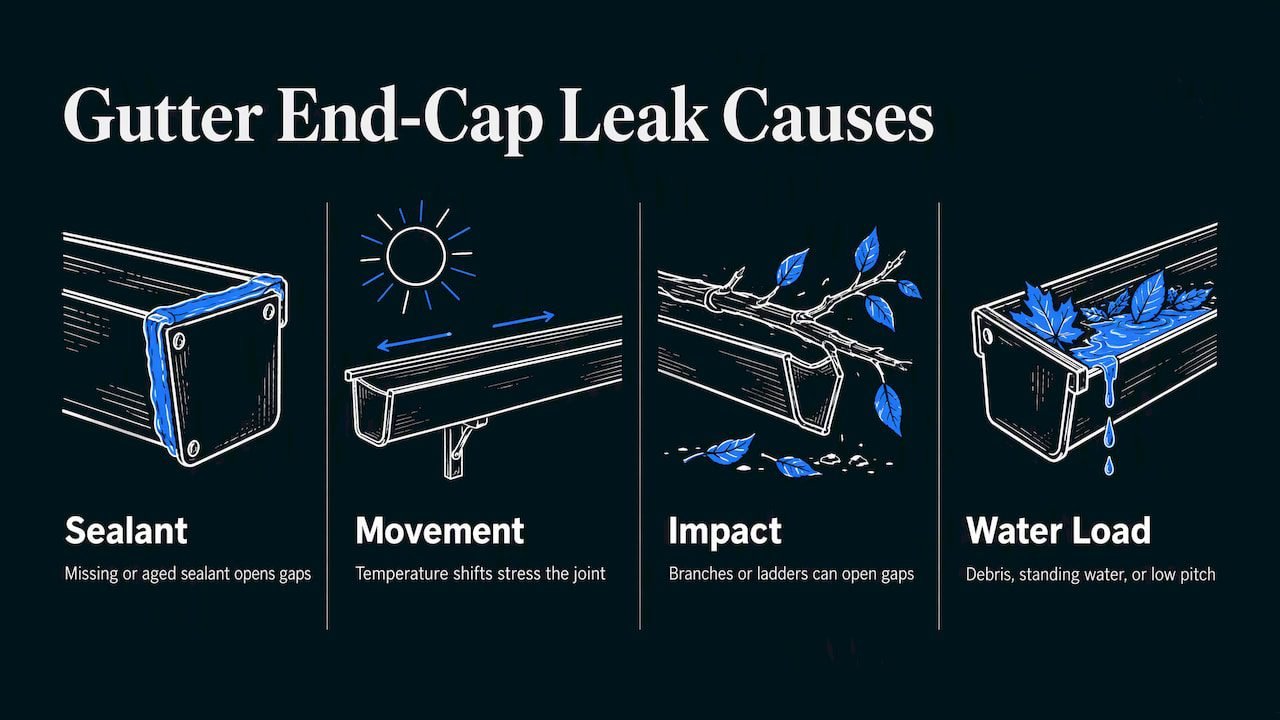
An end cap is a small piece that closes the open end of a gutter run. It sits in a joint that has to stay watertight while the metal heats, cools, and carries water and debris every day. That joint can fail in several ways.
The cap was never properly sealed. The Spruce notes that loose end caps cause leaks, and that some caps were installed without any sealant at all. Installation guidance from a major manufacturer calls for sealant along the full end cap joint and fasteners at the front, bottom, and rear, either pop rivets or a crimping tool. A cap that was only dabbed with caulk and pressed on may hold for a season or two and then start to weep.
The sealant aged out. Sealant is the part of a gutter that wears out first. When it dries, shrinks, or loses its grip, a hairline gap opens along the cap and water follows it. Rigid caulk, or sealant applied over dirt or oxidized aluminum, tends to fail early. That is also why a quick bead of caulk over an active leak rarely lasts.
The metal moves. Gutters expand and shrink with temperature. In Florida, a gutter in afternoon sun can swing a long way from its cool morning length, and the joints take that movement. Our page on gutter expansion joints explains how much a run can move and why it matters at ends and corners. A sealant that stays flexible handles this; one that hardens does not.
Damage or impact. This Old House lists extreme weather, age and wear, and impact from falling branches or ladders as reasons gutter sections get loose or damaged, which opens gaps where water escapes.
Debris and standing water. The same source says debris can dam water and force it to overflow, and the added weight can make gutters sag. If water sits at the end of a run because leaves have piled against the cap, that joint is under constant load. Southern Living, quoting a roofing professional, also points out that snow and ice over leaves and pine needles can make an end cap joint expand and leak. Snow is not our problem on the Gulf Coast, but wet pine needles packed against a cap are.
Wrong slope. Too little pitch toward the downspout leaves water standing at the low end, and that is often exactly where the cap is. This Old House includes improper slope, clogs, cracks or holes, and loose or damaged seams among the usual causes of leaks.
Is it the cap, the seal, or something else?
Before you buy a tube of sealant, spend ten minutes figuring out where the water is really coming from. A cap that looks fine can be innocent.
Watch it run. On a dry day, run a garden hose into the gutter upstream of the leak, or wait for a steady rain and look from the ground and then from a ladder. Note whether water appears at the front face of the cap, along the bottom seam, or behind it at the fascia. Our guide to a hose test for gutter overflow shows how to separate a leak from an overflow before you start any repair.
Look at the cap itself.
- A gap you can see or slide a fingernail into means the sealant has pulled away.
- Dried, cracked, or flaking sealant with dark streaking below it points to a slow seam leak.
- A cap that wiggles when you press on it is loose and needs fasteners as well as sealant.
- A cracked or warped cap, or a rubber seal that has rotted or slipped out, needs a new cap. People on repair forums often report that they replaced a cap and it still leaked in heavy rain. That usually means the new cap was pressed onto dirty metal or the seam was never resealed.
Check the rest of the gutter. If water is dripping at the cap only in heavy rain, the gutter may be overflowing because of a clog, a flat section, or a downspout that cannot keep up. Resealing the cap in that case treats a symptom. Look for standing water, sagging, and sections that have pulled away from the fascia.
Look at the fascia and soffit. Water that runs down behind a cap can soak the fascia board. If you see stains, soft spots, or peeling paint behind the end of the gutter, the leak has been going on for a while. Our pages on fascia board materials and soffit versus fascia can help you judge what you are looking at.
How to seal a leaking gutter end cap, step by step
This is the standard repair, built from The Spruce’s repair steps and the manufacturer’s installation guidance. Plan on a dry day with no rain in the forecast for at least a full day.
What you need: a stable ladder, a helper, a wire brush, a putty knife, rags, an abrasive pad, a replacement cap if the old one is damaged (left- or right-hand, matching your gutter profile), gutter sealant, and either pop rivets with a riveter or a crimping tool.
- Remove the old cap if it is damaged or loose. Pry it off gently, keeping the gutter shape intact. If the cap is sound and only the sealant has failed, you can leave it in place and reseal the joint, but removing it gives the best result.
- Scrape and brush off old sealant. Take the old material off both the gutter end and the cap. A putty knife and wire brush work well.
- Clean the surfaces. Brush and rinse with water, let everything dry fully, then scrub the bonding area with an abrasive pad. The Home Depot’s guide describes this same wire brush, water, dry, then abrasive pad routine. Sealant bonds to clean bare metal, not to chalky oxidation or grime.
- Dry-fit the cap. Check that you have the correct left- or right-hand cap and that it seats evenly over the gutter end.
- Apply sealant. Run a bead inside the cap’s groove, then press it onto the gutter. Wipe away the squeeze-out.
- Fasten it. Crimp the edges, and where the cap design allows, secure it at the front, bottom, and rear with pop rivets or a crimping tool, as the manufacturer instructs. Sealant alone is not a mechanical connection.
- Seal the inside joint. Add a bead along the inside seam of the joint so the seal does not depend on a single line of sealant. The manufacturer’s guide calls for sealant along the full joint.
- Let it cure, then test. Keep the area dry for the full cure time (more below), then run a hose into the gutter and watch the cap.
Choosing sealant and giving it time to cure
Not all caulk belongs on a gutter. Use a product made for gutter joints. For example, Geocel’s Pro Gutter Seal is designed for gutter joints and seams and is described as flexible, weather-resistant, and UV-resistant. Whatever you buy, check the label for aluminum or vinyl compatibility and for the temperature range at application.
Two habits make the difference:
- Flexibility beats hardness. A joint that moves needs a sealant that moves with it. Hard, brittle caulk will crack at the first hot-to-cool swing.
- Drying is not curing. A bead can skin over in minutes and still be soft underneath. GE Sealants advises following the manufacturer’s curing specifications and gives 24 to 48 hours as a general recommended cure time. Read your tube, because the number can differ by product and by weather. In Florida’s humid summers, give yourself the longer end.
If you are repairing an older aluminum gutter with a chalky surface, spend extra time on the abrasive pad. Most repeat leaks we see start with a shortcut at the cleaning step.
Ladder, power tool, and wet-weather safety
The end of a gutter is often the hardest spot to reach: over a side yard, a flower bed, or a porch roof. Most of the risk in this job is the ladder, not the sealant.
- The U.S. Consumer Product Safety Commission advises having a helper hold the base of the ladder, setting it on stable ground, and keeping it away from power lines.
- If you use a corded drill for rivets or screws, the same checklist calls for undamaged, outdoor-rated, grounded extension cords, no corded tools in damp or wet conditions, and GFCI protection on outdoor receptacles.
- A Massachusetts safety alert says an extension ladder should reach three feet above the roof edge, and no one should stand on the top three rungs. That applies if you are climbing to a gutter at a roof edge.
A cordless tool and a hand riveter remove the cord problem altogether. If you cannot reach the cap from a ladder that stays flat and steady, or if the cap is over a second story, stop and hire someone.
One more tip if you plan holiday or accent lighting along the roofline later: look into ways to install permanent lights on gutters without drilling, so you do not punch new holes near a freshly sealed joint.
When resealing is not enough
A resealed end cap should stay dry for years. If it leaks again, or you find other problems, the cap is rarely the whole story.
Time to call a professional if:
- The gutter is sagging, pulling away from the fascia, or has pitch problems. GE Sealants suggests considering full gutter replacement when damage is extensive or the gutter is sagging or pulling away.
- You find leaks at several seams, corners, and caps. That points to an aging system, not one bad joint. Our guide to signs your gutters need replacing lists what to look for.
- The fascia or soffit behind the cap is soft or stained.
- The gutter is old sectional aluminum with many seams. Each seam is a place for a leak to start. Seamless gutters are formed from a single run, so the only joints are at the corners and ends, and our page on seamless corner methods shows how those are done.
- The second-story or steep roof access makes a ladder repair unsafe.
Repair or replace? If the metal is sound and only a cap or two are leaking, repair is the sensible choice. If you are repeatedly resealing, or painting over problems, our article on whether to paint gutters or replace them helps you weigh the cost of keeping an old system going. For routine upkeep that prevents these leaks in the first place, see our seasonal gutter checklist and maintenance tips for seamless gutters.
Our perspective: why end caps fail on Florida homes
We have installed and repaired gutters for over 20 years in Sarasota and nearby counties, and end caps are one of the most common small leaks we are called about. In our experience the pattern is consistent: the cap was fine when it went on, but the sealant was asked to do all the work. Heat, humidity, salt air, and afternoon downpours are hard on a bead that is not backed by a rivet or crimp and a surface that was properly cleaned.
Three things we believe:
- Clean metal matters more than the brand of sealant. A good gutter sealant on a dirty surface fails faster than a decent sealant on a clean one.
- Fasten, then seal. Sealant keeps water out; fasteners keep the cap in place. You want both.
- A leak at the end often says something about the run. If water is pooling there, we check pitch, downspout capacity, and debris before we touch the cap. Sealing a joint that is overloaded only moves the problem.
We use salt-air-resistant aluminum for our installations because coastal air attacks lesser materials, and we stand behind the work with a Lifetime No-Clog Guarantee on our gutter guard installations and a promise not to leave a job until you are satisfied.
— Brian
Let us handle the leak
If you would rather not climb a ladder, or the end cap is only one of several drips, we can inspect the whole run, reseal or replace what is failing, and fix the cause so it does not come back. We handle gutter repair, cleaning, and storm damage restoration, and if the system is worn out, we install new seamless gutters through our gutter installation service. Our promise is satisfaction or no payment. Contact us through Five Star Aluminum to schedule a visit.
FAQ
How do you fix a leaking gutter end cap?
Remove the old cap or sealant, clean the metal with a wire brush and water, let it dry, and scuff it with an abrasive pad. Dry-fit the correct left- or right-hand cap, apply gutter sealant in its groove, press it on, crimp or rivet it, and seal the inside joint. Let it cure fully before testing with a hose.
Do gutter end caps need to be sealed?
Yes. Manufacturer installation guidance calls for sealant along the full end cap joint plus fastening with pop rivets or a crimping tool. A cap held only by friction or a thin bead will usually leak sooner or later.
How long should gutter sealant cure before it rains?
Follow the label on your product. GE Sealants gives 24 to 48 hours as a general recommended cure time, and drying on the surface is not the same as curing. In humid weather, plan for the longer end.
Why does my new end cap still leak?
Usually the surface was not clean or dry, the sealant was rigid or the wrong type, or the cap was not fastened. It can also be that water is overflowing from a clog or a flat section and reaching the cap faster than it drains. Check pitch, debris, and the downspout before you reseal.
Should I repair the cap or replace the gutter?
Repair when the metal is sound and the leak is isolated to one or two caps. Replace when the gutter is sagging, pulling away, or leaking in many places, since the cap is then one symptom of a failing system.
Sources
- How to Fix Leaking Gutters, The Spruce
- Aluminum Soffit, Fascia & Rainware installation manual
- How To Repair a Leaky Gutter, This Old House
- How To Repair a Gutter, This Old House
- What Causes Gutters To Leak, Southern Living
- How to Fix a Leaky Gutter, The Home Depot
- Geocel Pro Gutter Seal product data
- How to Repair Leaky Gutters: Caulk vs. Sealant Guide, GE Sealants
- Home Safe: Outdoor Repairs, CPSC
- Ladder safety, Massachusetts Department of Labor Standards